
DIY Project: How to install wood-look vinyl flooring
- Christie

- May 12, 2020
- 5 min read
Disclosure: This post is NOT sponsored or affiliated, it's just my opinion!

These floors look like hardwood, but they cost a fraction of the price.
They even have the texture of hardwood. Some other faux wood floors look so fake, it's as if a picture of wood was printed on top. The brand we use has 3-D grooves. Most people who see them installed believe they are the real thing.
Our preferred brand is NuCORE, which is available at Floor & Decor. The cost ranges between $2.59-$3.00 per square foot, depending on your color choice.
They are affordable and easy to install. We use them in our rentals and we also installed them in multiple rooms of our home.
The number one reason we like this brand is it's durability.
Here's my test for every vinyl floor on the market: I take out my keys and try to scratch them as hard as possible. On NuCORE vinyl, you won't make a mark.
These floors are also 100% waterproof and can be used in bathrooms. Although, I've never tried it.
The downside of vinyl floors is they do respond to heat. (So does wood.) For example, underneath the oven, you may see these planks shrink and expand, therefore moving them a little. We've fixed this in the past by simply putting a couple finishing nails through the moving plank.
How to Install
To begin, start by measuring your space for the square footage. Don't forget to add 10% extra for wastage.
You do not need to put down an underlayment with this brand, if you use the NuCORE planks that come with a cork bottom. The cork also helps with noise and insulation.
The exception to this rule is if you are installing on concrete, such as in a basement or if your house is on a slab, then you do need an underlayment. You should speak to someone at the store for guidance on this. But I can tell you that if you're going over wood subfloor, you don't need it.
Materials
- Razor blade
- Square
- Measuring tape
- Pencil (I recommend using a colored pencil that will stand out.)
- Broom and/or vacuum
- Multi-tool*
- Table saw*
- Hammer
- Needle nose pliers
* These tools are not essential, but they are helpful.
Step by step
It's much easier to SHOW you rather than TELL you how to do this. So I also created a video. The video shows one step of the process, I will explain how to install these from beginning to end in greater detail below. I will also share some key mistakes to watch out for.

1. Prep
To get started, make sure you prep your subfloor by looking for any nails or carpet staples sticking out.

These floors are pretty forgiving of minor imperfections in your subfloor surface, but if you leave a nail head sticking out it will cause your vinyl floor to lay unevenly and a button will pop up over time.
This is the frustrating and tedious part of prep work. The easiest thing to do is to bang all the nails and staples into the subfloor.

You may also want to scrape up any large blots of drywall mud and you must patch any large holes or areas where your subfloor drops off.

All base moulding should also be pulled off the walls, unless you plan to install quarter rounds after you're done with flooring.
2. Plan
Before you lay the floor, think about which way you want the planks to run. Generally, I like to run it away from the point of entry. This helps to create the illusion of a deeper room.

If you have old subfloor, rather than the big 4x8' sheets of plywood, you may consider running perpendicular to those skinny boards.

A third thing to consider is the number of cuts you'll have to do. If you run along the longest wall in the room, you'll have less pieces to cut!
3. Lay
Facing the wall you'll start on, put your first piece of flooring down in the left corner of the room. You'll run floors left to right, until the room is done.

Keep that first piece about 1/4" away from the walls. This gap will be hidden by your base moulding.
Make sure the interlocking grooves are facing up on the right and bottom of your piece. The grooves should be facing away from the walls, like this:

Grab your second piece, line up the left side (grooves down) with the right side of your first piece (grooves up). The easiest way is to tilt the new piece into the grooves, gradually lowering down while applying pressure to the seam. Use a hammer to gently pound it into place.


If you hammer these edges too hard, they will break. The interlocking grooved edges are the most fragile part. So use care, but be firm enough to get them fully interlocked. If you don't lock them in all the way, it will cause issues down the line.
Once you get to the end, making your first cut is simple. Rather than use a measuring tape to find the length of my last plank in the row, I like to flip the plank backwards and line it up below the first row, like shown here:

You're now lined up to do your first cut. (Again, be sure the edge with the downward facing interlocking grooves is preserved by putting that end toward the wall for your cut.)
I place my square tool in line with end of the last piece and I gently run my blade along the square for a straight score on top. Do this gently several times before applying more pressure.

If your blade is fresh & sharp, you'll only need to run over the plank 5-6 times, or less.
Next, put the scored line over your knee or a table edge and apply pressure until it snaps in half.

Then, tilt the downward facing grooves into place and install.

Before moving onto your second row of flooring, take a look at your starter wall. Chances are, you can now see it's not perfectly straight. Your floors, which are perfectly straight if you carefully installed each plank, may now highlight how there is a huge bow in the wall. You may need to push this starting line of planks closer to the wall to compensate for a deep bow. The idea is to try and have your first line be as straight as possible because everything else will hinge off the first row.
Once you're satisfied with the first row, you're good to repeat the process until your room is complete. To install the second row of planks and beyond, make sure your tilting in the long side of your plank edge into the plank grooves above it.

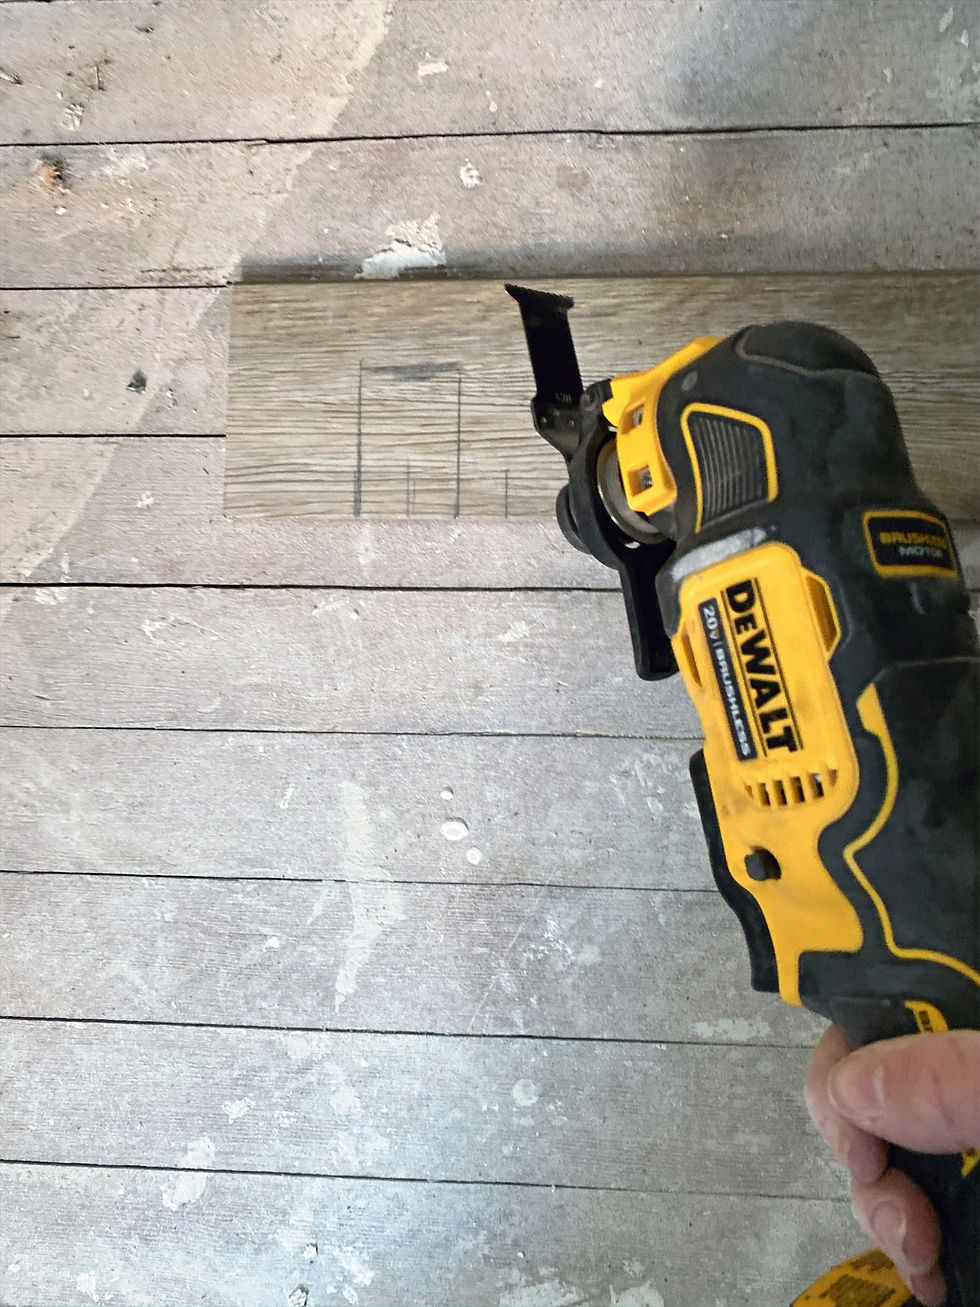
When you hit an obstruction like a heating pipe in the ground - the easiest way to cut around this is to use the multi tool! You can also use your blade. But a multi-tool will be faster and easier for those precise, little cuts.

A table saw may also come in handy. You may need to cut longways into your planks to thin them enough to fit. You can also use your razor blade.

All you need to do now is repeat the process.
Questions?
If you have any questions, please feel free to leave them below or reach out to me on Instagram! Sign up for our e-mail list below for more DIY and real estate investing tips!


Squarefoot Flooring has been a retail leader in the distribution of Flooring products for 10 Years. We currently provide services in Mississauga, Toronto, Brampton, Oakville, Markham, Richmond Hill. Stoney Creek, Niagara Falls. Hamilton, Ancaster, Burlington, Kitchener, Guelph, Sudbury, Pickering, Ajax, Whitby, Oshawa. We excel in providing a quality product in order to make your dream place a reality and have won the title for “Mississauga’s 2019 favorite business. With over 9000+ options for flooring we bring you the largest variety of styles, materials and colors to select tool rentals near me only the best.